Ux App Design Mockups
Ux App Design Mockups
A complete guide to designing mobile app and website mockups
![]()

Mockups are an excellent way to share the final design of your website or mobile app with clients and colleagues.
In this guide, we'll take a look at what mobile and website mockups are, why they're useful, and how to design them. We'll also throw in a few handy tips for working with mobile and website mockups.
Contents of this guide:
- What is a mockup?
- Why design a mockup?
- Visual design and interaction in a mockup
- How to design a mockup step-by-step
- Best practices for mockup design
- Reasons for designing a responsive mockup
What is a mockup?
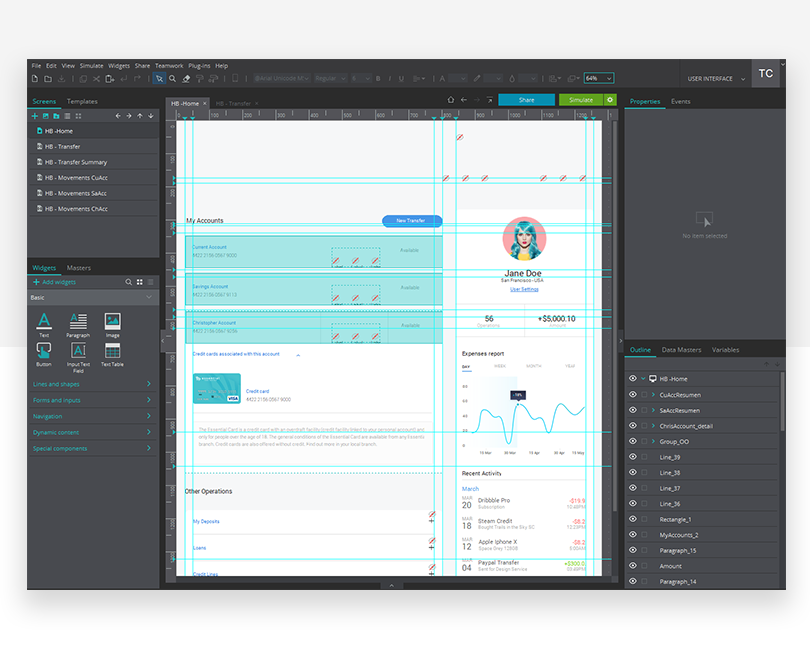
In the world of website and mobile app design, a mockup is a high-fidelity simulation of how a website or mobile app will look. Mockups combine the structure and logic of a wireframe with hi-fidelity graphics and UI elements. Website mockups don't include the transitions and usable functions which you'll see in a prototype and in the final product. In this way, mockups sit as an intermediate stage in product design, with much more visual detail than a wireframe, but without the full functionality of a prototype.
A really good way to think of a mockup is to look at how a car is designed. The initial stages of car design involve sketching out its basic lines and then developing a schematic plan. The next stage is to create a life-sized model of the car that looks exactly like the final product will. This is the mockup. These mockups are used to test a vehicle's aerodynamics in a wind tunnel, and to gauge popular opinion about how the car looks. But they lack the engine, moving parts and electrical and electronic systems that will be found in the final product.
App and website mockups are useful because they help you to deliver a near-final design of the whole mobile app or website, without having to get into the hard work of building complex functions. Thanks to their visual impact, mockups are an excellent resource to share with your client so that they can validate the design decisions you've made, and their impact on the user experience before you start working on the inner workings of the product.
Mobile app and website mockups can also be useful for an initial round of user testing. While users can't interact with a mockup, they can give their feedback on the design at a relatively early stage in product development. Receiving negative user or client feedback at this stage would be a lot less costly than receiving it later on.
Why design a mockup? Four scenarios
There are lots of different reasons why it's a good idea to design a mockup for your website or mobile app.
1 — Maximize client buy-in, early on
Designing a mobile app or website mockup makes it much easier for you to communicate and share your product design ideas with your client at an early stage in product development. The benefits can be huge. Presenting your client with a hi-fidelity, clickable mockup is an excellent way to convince them that your design approach is right for their product. Furthermore, designing a mockup with full visual design can prevent nasty surprises closer to the product launch date, allowing the client to give you their feedback on the design before costly development work is done.
2 — Improve collaboration and communication with your development team
It's not just communication with your client that can benefit from designing a mockup. The design handoff process is a vital moment in product development. It's when you hand the final design to developers, complete with the assets and guidelines they'll need to take your mockup and code it into a living, breathing product.
Creating a mockup with a full visual design makes it much easier for your developer colleagues to see what is expected of them when they develop the actual product. A clear and complete website mockup, ideally combined with a design system that includes a style guide, design specifications, patterns and components, aids developers by helping to ensure that there are no uncertainties in the product.
3 — Boost UX early in development, improve your efficiency
Creating a mockup helps you spot usability issues before you start coding, which makes for a more efficient, cheaper overall project. Working with a mockup helps you to define user flows, visual hierarchy, spacing and typography, meaning that you're focused on UX early. This will help you establish a UX-first approach to product development. Plus, it will reduce the time spent reworking your product, saving time and resources.
4 — Bring your users on board with initial user testing
Using a mockup to start user testing early in your product's development process is an excellent way to get valuable user feedback on the basic look and feel of your website or mobile app. Even if it's a simple sit-down session with some coworkers, you want to get as much user input as you can, as soon as you can. Consider their reaction to: typography and spacing, use of color, navigational elements and where they're placed, graphics and icons, usability and accessibility.

Visual design and interaction in a mockup
A mobile app or website mockup brings together structural and visual elements to present a high-fidelity vision of the end product.
What does a mockup consist of?
A mobile app or website mockup is made up of both structural and design elements.
Structural elements are aspects of the website or app which define how information is organized, structured and presented in order to achieve the best possible user experience. We divide them into three main types:
- Information architecture
How information in the app or website is organized, logically and hierarchically, to provide the user with the most coherent experience. The aim of information architecture is to avoid any moment when the user might be confused or unhappily surprised by the behavior of the app, or the placement of its information. - Navigation & structure
How the user will interact and find their way around the app or website. Importantly, this refers to establishing a navigational design — for example, buttons, breadcrumbs, menus — ready to add interaction. - Layout
Layout covers how content elements will be positioned in the website or app. Content elements include: titles, text boxes, images, videos, info cards and embedded social media, and their borders, spacing and positioning.

Design elements are the parts of the app or website which establish how it looks and feels. There are five main types of design element to consider in your app or website mockup:
- Branding and logo
A vital part of the design, the branding, and logo act as a linchpin which holds the user experience together and helps to define many of the ground rules which affect other aspects of the design. - Colors
Building of the central branding, the colors you use in a website or app are the visual elements which your users will tend to notice first. Be aware that some users might have visual impairments that prevent them from seeing color in the same way as other people, so you should avoid using color as the only way to communicate something in your app or website. - Shape and design of elements and components
You will need to decide exactly how your navigational and content elements are going to look like, even if they don't actually do anything in the mockup. These elements are used to allow your user to interact with the website or app, and their look and feel is a critical part of the design. - Typography
The fonts and font sizes you choose for your app or website must be clearly reflected in your mockup. The aim is to achieve optimal readability and coherence for titles and headings, navigation and content alike. - Images
Your mockup wouldn't be complete if it didn't include the images that will appear in the final product.
Interaction in Mockups
There is some debate out there about how to handle interaction in mockups. Many purists insist that mockups shouldn't include any interactions at all. But remember: your mockup is made for communicating your product design with colleagues and clients. Here at Justinmind, we believe in a common sense approach: making your mockup clickable makes it much easier to use and understand.

For example, while a mockup doesn't need to include transitions between screens or animated microinteractions, it can make a lot of sense to include some basic navigational interaction within your website or mobile app — make it clickable. Making your basic navigational elements interactive is easily done and will add a new dimension to your mockup, without converting it into a fully interactive prototype.
Adding this sort of limited interactivity into your mockup can help you explain its design to clients and developers, boosting buy-in and simplifying the design handoff. It also means that you can start with user testing so that you can get early feedback on how your website or mobile app looks and feels.
Make your mockup clickable. It makes sense.
How to design a mockup step-by-step
It's important to follow a clear plan when you design a mobile or website mockup.
There are two main ways of starting your mockup: either you start with a wireframe or you jump straight into creating a mockup. Here at Justinmind, we recommend that you create a wireframe first. The wireframe for your product should include a clear schematic of what elements appear on the screen, where they are — their positions in relation to one another, and what they do.
Skipping an initial wireframe might sound like a time saver but the truth is that all those elements help you focus on basic structural elements at the beginning of the design process. Plus, they're going to be needed in your mockup anyway. For these reasons, in this step-by-step guide, we're going to assume that you've already got a wireframe prepared, complete with your structure, layout, hierarchy and functionality already mapped out.
Here's our step-by-step guide to designing a high-fidelity, clickable mockup.
Step 1: graphic design
This first step involves adding all the graphical elements to your mockup. Remember: the mockup needs to look like a finished product, so you need to create and use high-quality graphical assets in your mockup. There's no point in producing a mockup that looks bad. Here are the graphical design elements that you will want to include at this stage.
Navigation and calls to action
Pay special attention to the design of your navigational elements and calls to action. They need to be clear, easy to understand and bold but never overpowering. Make sure you think about different button design concepts, sizes, shadows and how they're going to be used.
Color
Color plays a key part in the user experience. Colors have profound emotional effects on users, so getting an understanding of the psychology of color is a good idea before you start picking colors out. For example: dark blue and gold can seem somber and regal, and perhaps old fashioned, while coral pink and turquoise will be seen as more modern but perhaps less reliable and authoritative. Getting your color choices wrong can sink your product from the very instant a user sees it.

Once you've picked out the main color, you should aim to use a color scheme where the colors work well together. This can be harder than it sounds. We recommend using a color combinations tool like Adobe Color CC to find complementary colors to use in your product. There's some science to identifying which colors work well together, as well as a little bit of fashion and some subjective opinion.
Images and icons
When it comes to UI elements, it's always a good idea to stick with UI kits so that users are already familiar with the design language you're using. There are UI kits available for web, iOS and Android, as well as numerous free icon sets and templates.

For images illustrating your content, you should aim for high-quality PNGs — pixelated images in your mockup can leave users with a sense that something isn't working properly. If final images are not available, use a stock images service to provide some placeholder images.
Typography
The typography you use for content and microcopy needs to look good and it needs to be complementary. Just like for color, we recommend finding complementary font families that play well together to prevent a jarring or uncanny user experience. What you really want to achieve is the use of different fonts which look like they were made to work together, even if they weren't.
Part of getting the typography right is spacing. Line spacing should always be expressed in proportions rather than exact values. As a rule of thumb, aim for line spacing of 140–180% for body text if you include content in your product. For headings, titles and microcopy, make sure that your text is never cramped — aim to provide for plenty of space, even on the smallest screen, so that text can breathe.
Content
Fill in the content areas of your product with text and images which help the user to see exactly how the product will look when it's complete.
While it's not absolutely necessary to have a final copy for every text box in the mockup, we do recommend trying to use real headings and title texts. Body text can be replaced with trusty old Lorem Ipsum, or an alternative, but the very best mockups have real content all the way through. Using real content is a good idea for four reasons:
- Real content makes it easier for users to understand the function of each screen. This is really important during user testing.
- It encourages the client to think about content early on. Content expectations will often impact layout and design and ask your client to provide sample content at the mockup stage is a good way to get them to decide that an intro text needs to be longer or shorter, preventing costly changes later in development.
- We tend to subscribe to the philosophy that filler text should be banished from your designs. Using real content shows that you care about what the content is and what it means for your website or app, not just where it goes. After all, the content is what your users want. Build real content into your design from an early stage and your design will benefit.
- Plus, Lorem Ipsum isn't even great filler text. It's too constant and doesn't even look like real content. If you must use filler text, go for an alternative.
Step 2: Interaction
Once you have the graphical design of your app or website mockup complete, it's time to add in some interaction. As we said before, we believe a mockup should be clickable, otherwise, it's going to be much less useful.

When you add interaction to your mobile app or website mockup, focus on the basic navigation within the product, not on its advanced functions. You should aim to add enough interactive elements so that a user can explore the website mockup, easily passing from page to page. Focus on the most important use cases — there's no need to try to predict every possibility at this stage.
User flows in mockups
A user flow is a path that a user follows, from entry to exit, as they navigate their way through your website or mobile app. Here are a couple of examples of user flows:
- User logs into social photo app, checks feed, likes 2 photos, publishes one of her own.
- User enters website content page from Google, reads article, clicks call to action, registers.
You will have developed user personas and flows way back when you started looking at how the website or mobile app was going to work. And you applied them when you established the basic layout in your wireframe. It's now time to revisit the user flows you sketched out and apply them to navigation in your website mockup.
For each user flow you have established, add in the navigational interactions that are needed for the user to achieve their goal in the mockup. If the user needs to carry out a more complex operation like posting a photo to a social app, you shouldn't try to create an interactive prototype of this function in your mockup. You only need to provide the navigational buttons which show how many steps the user will need to pass in order to complete that user flow. Your aim is to let a user see where they'd need to do something proceed to the next screen or page.
Step 3: User testing
Once you have your layout, visual design and basic interactions established, it's time to start user testing. Mockup user testing can be done in lots of different ways. In terms of the different types of user testing that can be done at different stages of product development, we agree with Usability Geek's take:
There are 3 main categories of usability testing:
- Explorative
Used early in product development to assess the effectiveness and usability of a preliminary design or prototype, as well as users' thought processes and conceptual understanding. - Assessment
Used midway in product development or as an overall usability test for technology evaluation. Evaluates real-time trials of the technology to determine the satisfaction, effectiveness, and overall usability. - Comparative
Compares two or more instructional technology products or designs and distinguishes the strengths and weaknesses of each.
User testing on a clickable website mockup should focus on the explorative side. The idea is to test the mockup to see how easily its design can be understood. You want to find out how clear the mockup is to a new user, and how well they understand what they can do with it and what's expected of them.
Four mockup user testing tips
- Make sure you have alternate user paths built in to the mockup
Build the mockup for various potential user flows, not just one. This helps increase the amount that it can be explored and opens things up so that your users can say what they thought about navigating the product. - Explain that they're testing a clickable mockup
There's nothing worse than having a user test a mockup, only for them to say afterward that nothing worked, a video didn't play, and they couldn't register. Make sure they understand the limitations of the mockup before they start testing it. But don't go into detail about transitions or other elements which will be added in later: giving too much info away can damage the accuracy of your test. - Always test with the right users
Go back to your user personas and make sure you're testing with people who can fit with the user types you already defined. Put simply, there's no point asking someone who's not interested in the main goal or subject of your app or website, to help with testing. - Client testing is user testing
You should consider client testing to be a form of user testing. Make sure that client testers have clear instructions before they start testing. Just because it's their product in the end, don't take the other three tips for granted when you hand them a mockup to test!
Step 4: apply changes, iterate, and more user testing
This step is simple, but often needs to be repeated several times. Take your user feedback, analyze it and fix what needs to be fixed in the mockup. Then test again.
Here at Justinmind, we're firm believers in the Agile methodology — we even use it to plan our blog — and we know that this really is the best approach to developing your product: define a minimal viable product, create your mockup, test with users, fix problems and test again until the users are happy. In our experience, this is the most efficient way to develop your product.
Bottom line: the earlier you fix problems and iterate, the cheaper it will be.
The process of iteration is vital because it takes feedback from internal and user testing and tells you two things: what's working and what isn't. What's working can be left alone, and what isn't working can be fixed. Then, the whole mockup is sent for testing again.
Step 5: developer handoff
The final stage of mockup design is to hand the mobile app or website mockup to the development team, so they can start to code the product.
But it's not as simple as simply sending them the mockup and saying "Have fun!".
We recommend establishing a developer handoff protocol to make sure that things go as smoothly as possible. This protocol should define exactly what the developer needs to receive in order to start their work. As a rough guide, for most products this will include the items in the following list, partially inspired by Mohammed Bilal's excellent post at UX Collective:
- Product brief and definition of the MVP
Originally prepared by the client, and most likely then analyzed and redefined with a product team and UX, the product brief should be a short definition of what the product is and how it should work. Ideally, it should include a minimal viable product definition, clearly stipulating the minimal product features that need to be included for launch. It can also mention some user personas and flows which form the basis of the user experience, but try to avoid making it too long and detailed. - Mockup
What we've been talking about today! Obviously, this ought to meet the brief. If you've followed our guide, it's going to be amazing, we're sure. - Design system
Ideally, all the specifications, assets and the style guide will already be defined as part of your design system. If not, now's the time to define them and include them in the developer handoff. - Checklist
This is more for you than anything else. Make sure you're handing over everything you're supposed to. List out all the screens, interactions, assets, specs, support documents… and make sure they're all there when you do the handoff.
So that's our step-by-step guide for app or website mockup design. But wait, there's more! We've got a few more tips to share, to take your mockup game up a notch or two.
Best practices for mobile and website mockup design
We've covered the technical steps needed to design your website mockup. But there are more aspects to consider in the mockup design process. Here are five best practices which we recommend that you follow.
- Mobile first, responsive design
Yes, it's a website and your design rig's huge monitor gives you so much real estate, it would be a shame not to take advantage. But most people will be viewing your website on a mobile device. We recommend starting out with the mobile site, because that's the version where space is at a premium. Designing for the smallest screen makes you focus on the very most important aspects of your app. Plus, it's much easier to evolve your design from smaller to bigger screens than the other way around. - Use SVGs for icons and other graphics
When applicable, we recommend using vector graphics for elements in your website mockup. The main benefit is obvious: scalability. SVGs can scale up and down without losing quality or pixelating, especially important now you've adopted that mobile first, responsive design approach we just talked about. - Google Fonts FTW!
Using Google Fonts for your website mockup has three main advantages: your site will look better, for free; you'll boost consistency across platforms, making for a better user experience; and your website will run faster thanks to the way that Google caches the font files. It's a win win win! - Adopt a design system
Design systems are another of those concepts that can seem like a bit of a luxury: a lot of work is needed at the start, when all you really want to be doing is designing a website mockup. But the advantages of a design system can be huge: you can massively reduce the number of decisions that need to be made in your day-to-day, and simultaneously boost development efficiency. - Build accessibility into your website mockup from the start
Accessibility means a lot more than "Can blind people use my website?". The aim of designing for web accessibility is to create websites that are easy for everyone to use and navigate. That means making sure microcopy is clear, avoiding color as the only indicator for navigation, never using images with text, and yes: adding in Alt text for every image.
- Keep it simple. Then make it simpler.
An old paradigm, perhaps, but it bears repeating over and over. For every screen, every function, every process and every step in the user flow, consider: how can I make this easier for the user? Can't that 3-screen sign up flow be reduced down to 1 screen? - Only ask for the data you absolutely need
Related to the previous point, avoid the temptation to ask for too much of your users' info, especially the first time they run the app. Asking for overshare will bloat the onboarding process and potentially scare users away before they've even seen your app's amazing benefits. - Mockup for devices
This might sound obvious, but it's important: make sure that you design your mobile app mockup so that it can be viewed on an actual mobile device. Asking a user to test a mobile app on a PC will result in unreliable user testing results, wasting your time and resources.
Reasons for designing a responsive website mockup
There are arguments against designing responsive website mockups: mostly, they focus on the plethora of devices and screen sizes out there and the implied extra difficulty of creating a useful responsive mockup. Here at Justinmind, we disagree with that approach. We've found that the best approach is to design a responsive mockup that's high-fidelity and clickable. Here's why:
- Avoid rework
In a responsive website mockup, the user can see exactly how the website will be, on a real device. This means they can validate and approve real specifications. Furthermore, it helps the developers to visualize the specs in a way that they can define the correct technical solution and plan the project much more accurately. - Reduce back and forth between design and development teams
Responsive mockups are inherently more complete and detailed. That means they help reduce uncertainties and doubts. When everyone has the info they need, there's less need for back and forth. - Facilitates expectation management between project stakeholders
Another benefit of responsive website mockups is that they help to make sure that all stakeholders are on the same… page, if you'll forgive the pun. Think about it: it makes so much more sense to have a mockup which works on multiple devices and screen sizes, rather than waiting until the product is finished. - Faster time to market
Thanks to the other points we've mentioned, designing a responsive mockup will improve time to market thanks to better planning and reduced reworking.
…in other words, designing responsive mockups is a seriously good idea.
Source: https://uxplanet.org/complete-guide-to-designing-mobile-app-and-website-mockups-1869aaa03627


Tidak ada komentar:
Tulis komentar